mRemoteNG is another great and easy tool to use if you want to access your VPS or dedicated server from Windows operating system. Follow the guide below to easily set up access to your service using this application.
Prerequisites
Make sure you have:
- mRemoteNG application downloaded and installed on your Windows PC. Make sure to download it from official product website.
- Received service activation email with your service connection details.
How to use mRemoteNG?
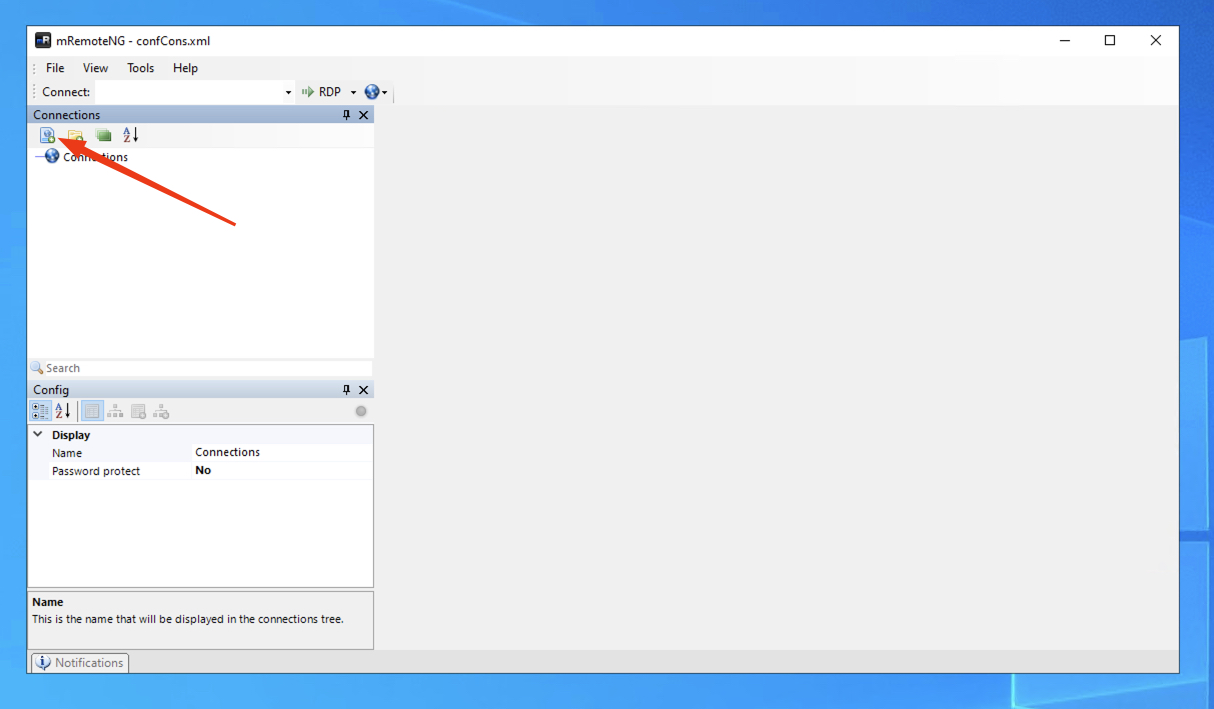
1. Open application and add new connection
- Open mRemoteNG application and click Add new connection icon to add new remote desktop.
2. Configure login credentials
Select created new connection and add the following data in the config menu:
- Name – enter friendly name, so you could easily recognize remote desktop;
- Hostname/IP – enter IP address of your service from the activation email;
Please note: enter IP address without port number (:13389) at the end - Enter service username from activation email;
- Enter password from the activation email;
- Change port value to 13389;
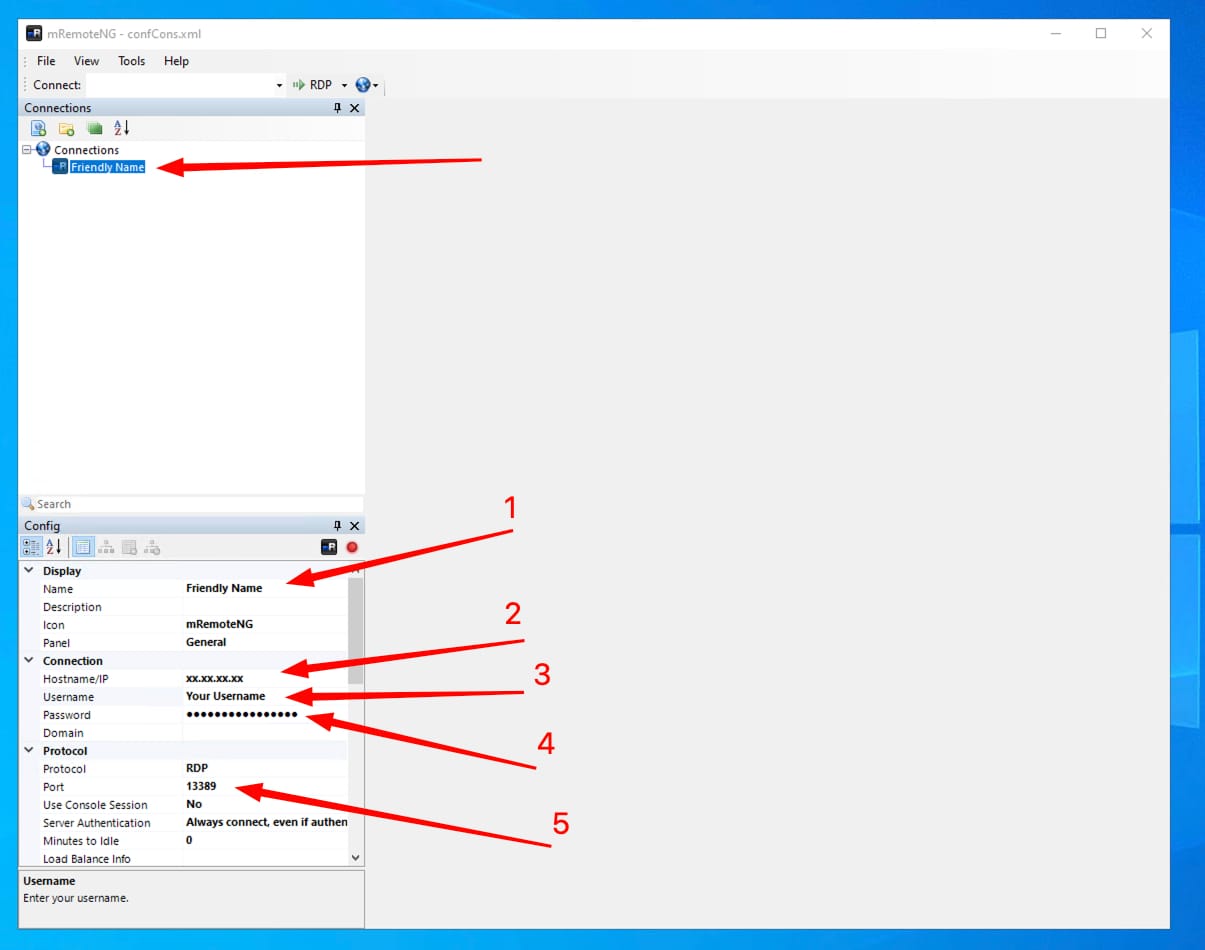
Please note: This is the part where spaces in the username or password field can be accidentally pasted. Make sure that you carefully select and copy your credentials from the activation email and no spaces are being copied.
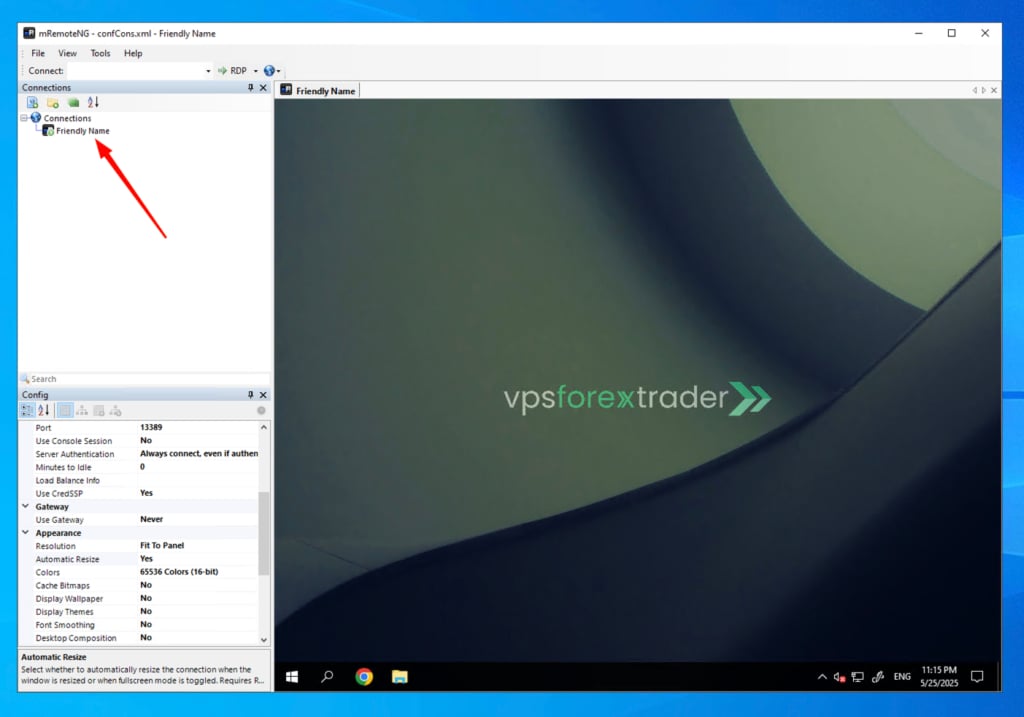
3. Connect to Your Service
Once all data is filled in, simply double-click on the remote connection in the list to access your service
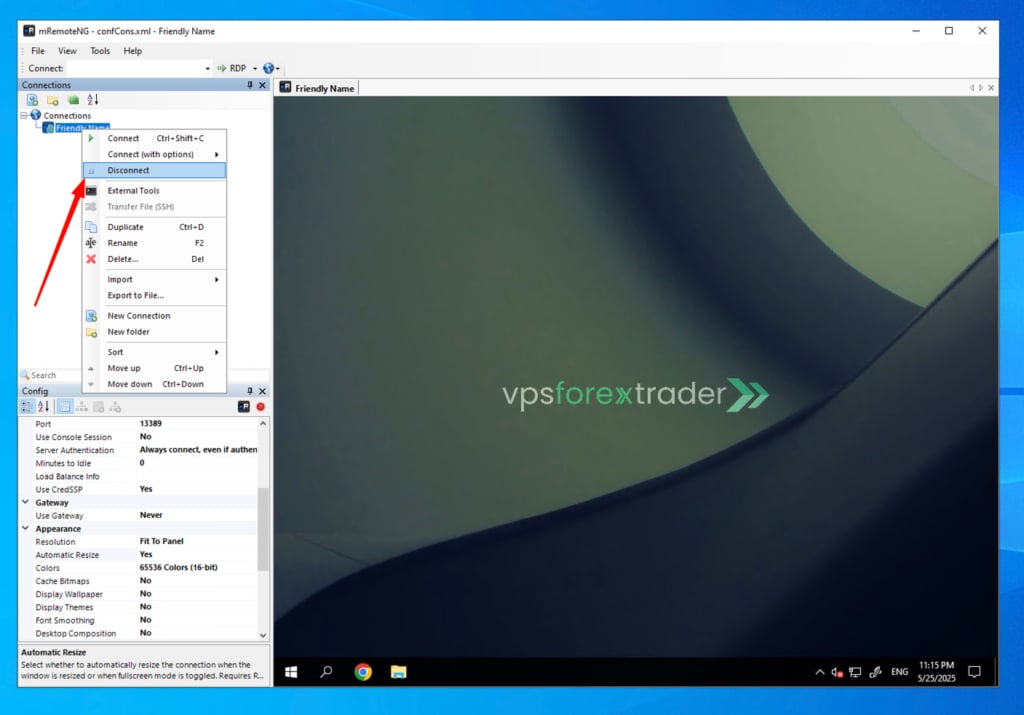
4. Disconnect When Done
If you wish to disconnect from your server, click right mouse button on the remote desktop in the list and then click Disconnect.
If you encounter any difficulties or have any questions, please do not hesitate to contact our support team!