
As soon as the order is placed and the payment is completed, server deployment begins. Once completed, you will receive an activation email which contains all details that are needed to access your server.
For Windows users, we recommend using a built-in tool called Remote Desktop Connection.
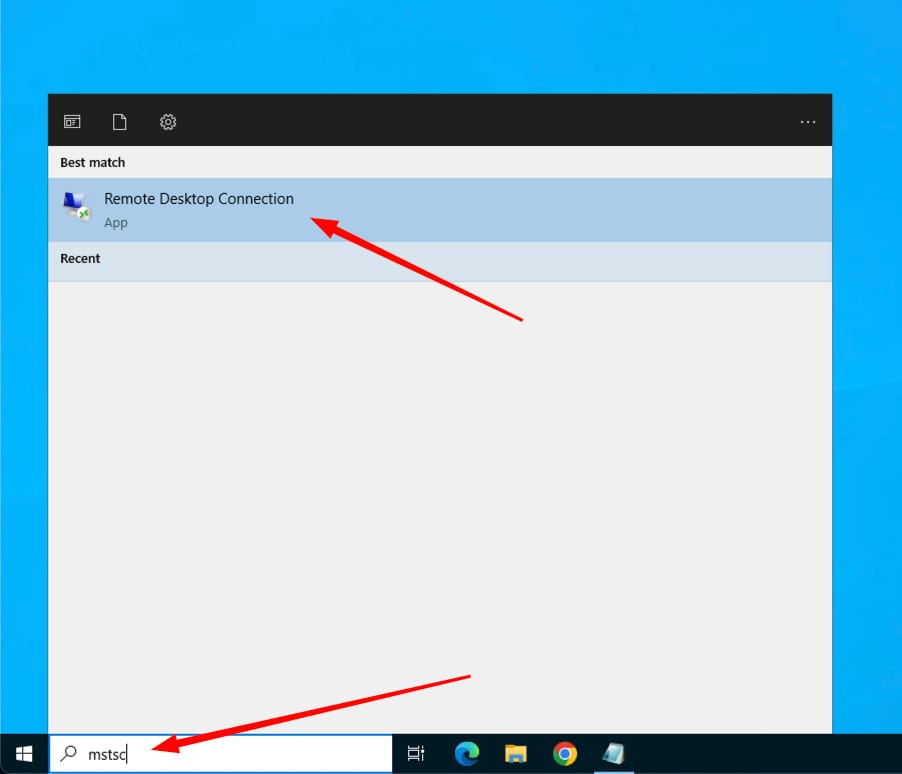
How to access remote server using Windows Remote Desktop Connection?
STEP 1:
Open Windows Search (or click Win+S), type mstsc and open Remote Desktop Connection.
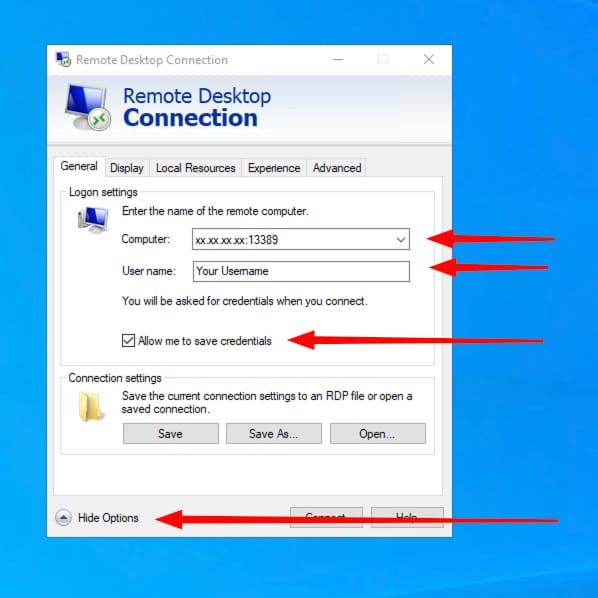
STEP 2:
Click Show Options at the bottom to expand application window.
In the Computer and Username fields, enter the IP address and username from the service activation email.
Check the box at Allow me to save credentials to save your details for later use.
STEP 3:
Enter password from your activation email when prompted. Check the box at Remember me to save your password for later use and click OK.
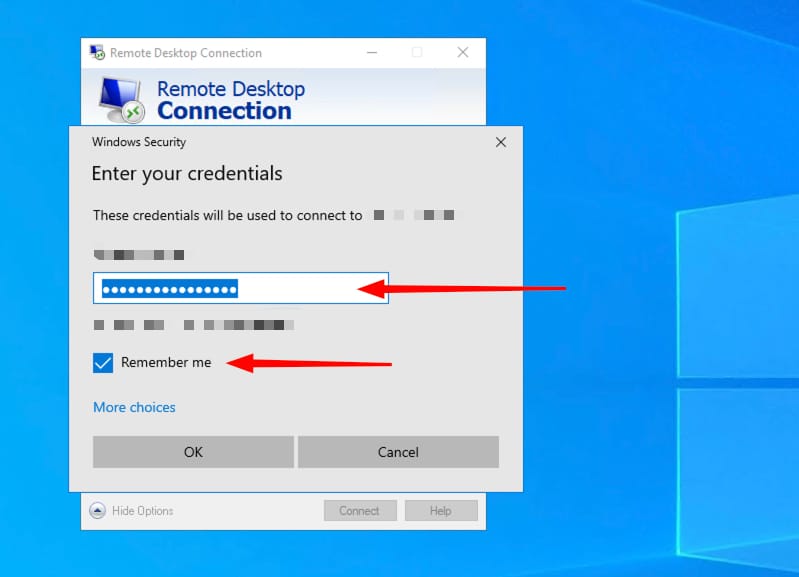
Please note: This is the part where spaces in the username or password field can be accidentally pasted. Make sure that you carefully select and copy your credentials from the activation email and no spaces are being copied.
STEP 4:
If you receive certificate warning message, tick the box at Don’t ask me again for connections to this computer and press Yes.
After completing the steps above, you will successfully connect to your remote desktop.

How to create a shortcut to your remote desktop?
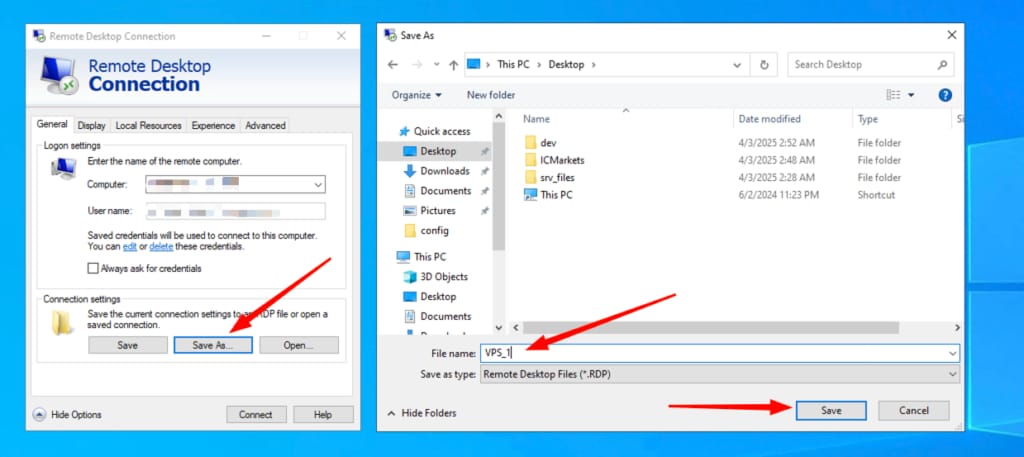
You can easily save your filled in details to .rdp file for easier access in the future.
To do that, click Save As… option in your Remote Desktop Connection window, name your remote computer to your preference and save it at easy-to-access location (for example, on your desktop).
Next time, simply click on the saved remote desktop and you’ll be connected to your service!
If you encounter any difficulties or have any questions, please do not hesitate to contact our support team!